The easiest way to move a WordPress site to Nordicway is by using a migration plugin. However, particularly large sites can be challenging to move with a plugin. In such cases, manual migration is necessary. Manual migration consists of 6 steps:
Step 1: Export Database from Current Provider
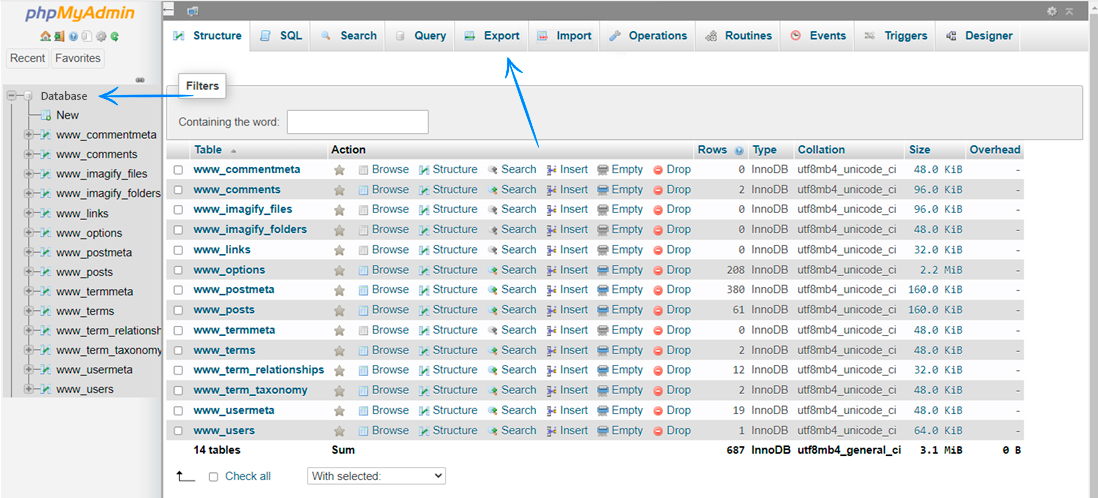
First, export your tables from the database of your current provider. It's important to export only the tables, not the entire database. Here's how:
- Log in to PHPmyAdmin at your current provider.
- Select the database you want to export.
- Click "Export."
Make sure it says "Export tables from the database...":
Step 2: Export/Copy Files from Current Provider
This is best done with FileZilla. Log in to your current provider using FileZilla, select all the files in your WordPress directory, and download them to a folder on your computer. Most providers have guides for FileZilla, and if not, you can find tutorials on platforms like YouTube.
Alternatively, contact your current provider's support and ask them to export all your WordPress files and send them to you in a zip file.
Step 3: Create a Database at Nordicway and Corresponding Database User
Now it's time to import and upload the database and files from your previous provider to Nordicway. Before doing this, you need to create a database (and user) where you can import your database tables.
In the video below, we show you how to quickly and easily create a database and a database user in our system at Nordicway.
Step 4: Import Database at nordicway
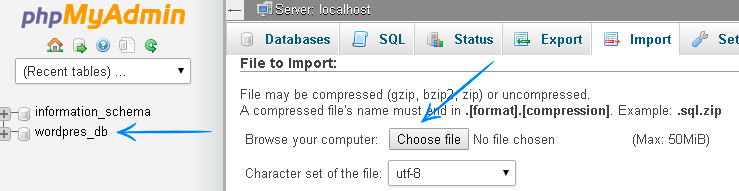
Now, you need to import the tables into your new database. Here's how:
- Log in to PhpMyAdmin via cPanel.
- Select the database where you want to import the tables.
- Import the SQL file you received from your previous provider.
Make sure to choose the correct database to import into; otherwise, you'll get this error:
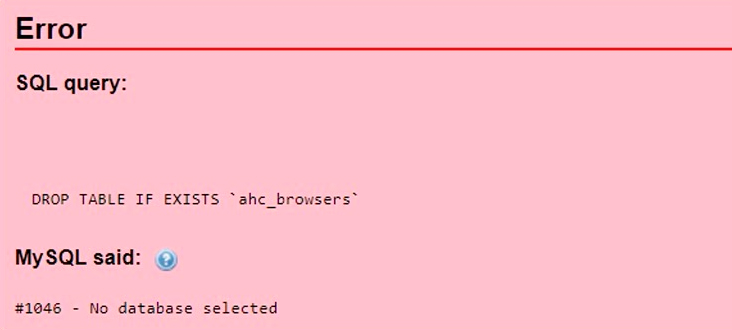
There's also a size limit for SQL file imports.
If your file is larger than the limit, split it into two files. Copy your SQL file, find a point roughly in the middle, and delete everything after a line that starts with "INSERT INTO." This way, you'll have two files—one containing everything before "INSERT INTO" and the other containing everything after (including "INSERT INTO"). Import the files one after the other.
Step 5: Upload Files to nordicway
You also need to upload your files to nordicway. If it's your main domain, upload the files to the public_html folder. If it's an addon domain, upload them to a folder with the same name as the domain. You can upload files in two ways:
- Use FileZilla to upload them, similar to how you downloaded them. Refer to this guide for assistance.
- Upload a zip file and extract it into your folder at nordicway. This, of course, requires your files to be in a zip format.
Step 6: Update wp-config.php at nordicway
Your files and database are now at nordicway. All you need to do is update your wp-config.php file so your site at nordicway uses the new database details.
You can edit your wp-config.php file using the File Manager, as shown below:
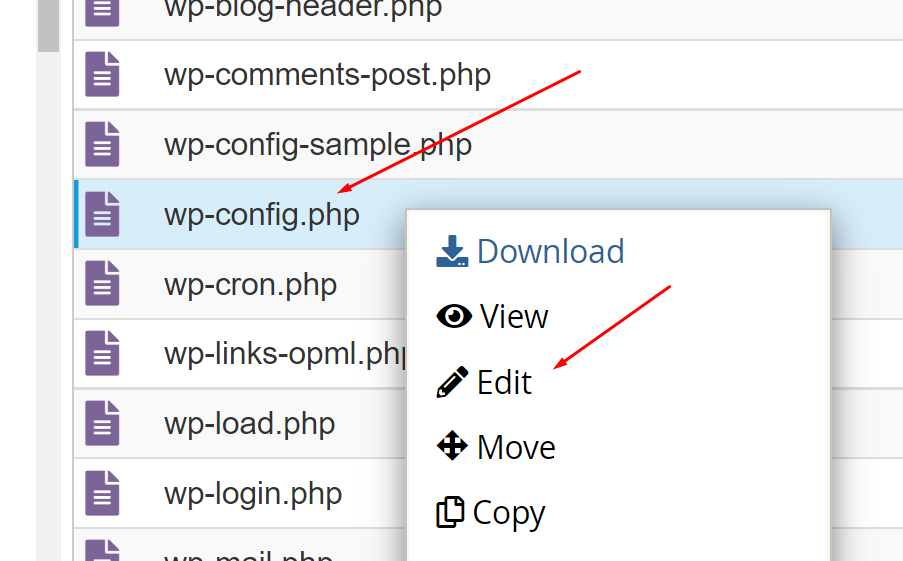
In this file, update the information to match your new database and corresponding user details at nordicway:
/** The name of the database for WordPress */
define('DB_NAME', 'Your new database name');
/** MySQL database username */
define('DB_USER', 'Your database user with full access');
/** MySQL database password */
define('DB_PASSWORD', 'The password your user uses');
/** MySQL hostname */
define('DB_HOST', 'localhost');
And that's it! You can now go to your site and see if everything looks correct. If you still see your old provider's site, it's because you haven't yet changed your nameservers.